How can I request an ACT transcript through Claudio?
This article will provide a brief step-by-step process on how you can request ACT Transcription through the Claudio assistant.
TIP: Before going through the steps of this article, ensure that you have created and activated your Claudio account. If you have created a trial account with us, ensure that you have enough time left over in your trial.
Click here to learn how to register your Claudio account.
Click here to learn how to activate your Claudio account.
Table of Contents
1.Log in to Claudio.

2.Find the ACT Request Form.

3.Name your Job and select a profile.

4.Fill in the information from your Ontario Court Proceeding Form.

5.Upload File(s).

6.Modify the start and end time of your transcription.(optional)

7.Submit your file.
As an Ordering Party, if you have requested and received a completed Order for Court Transcript of an Ontario Court Proceeding form, you can use the information on that form to get a transcription of the court proceeding through Claudio.
To request a ACT Transcript through Claudio, follow the steps below:
NOTE: Creating a request for an ACT Transcript is only available in the Canadian Region.
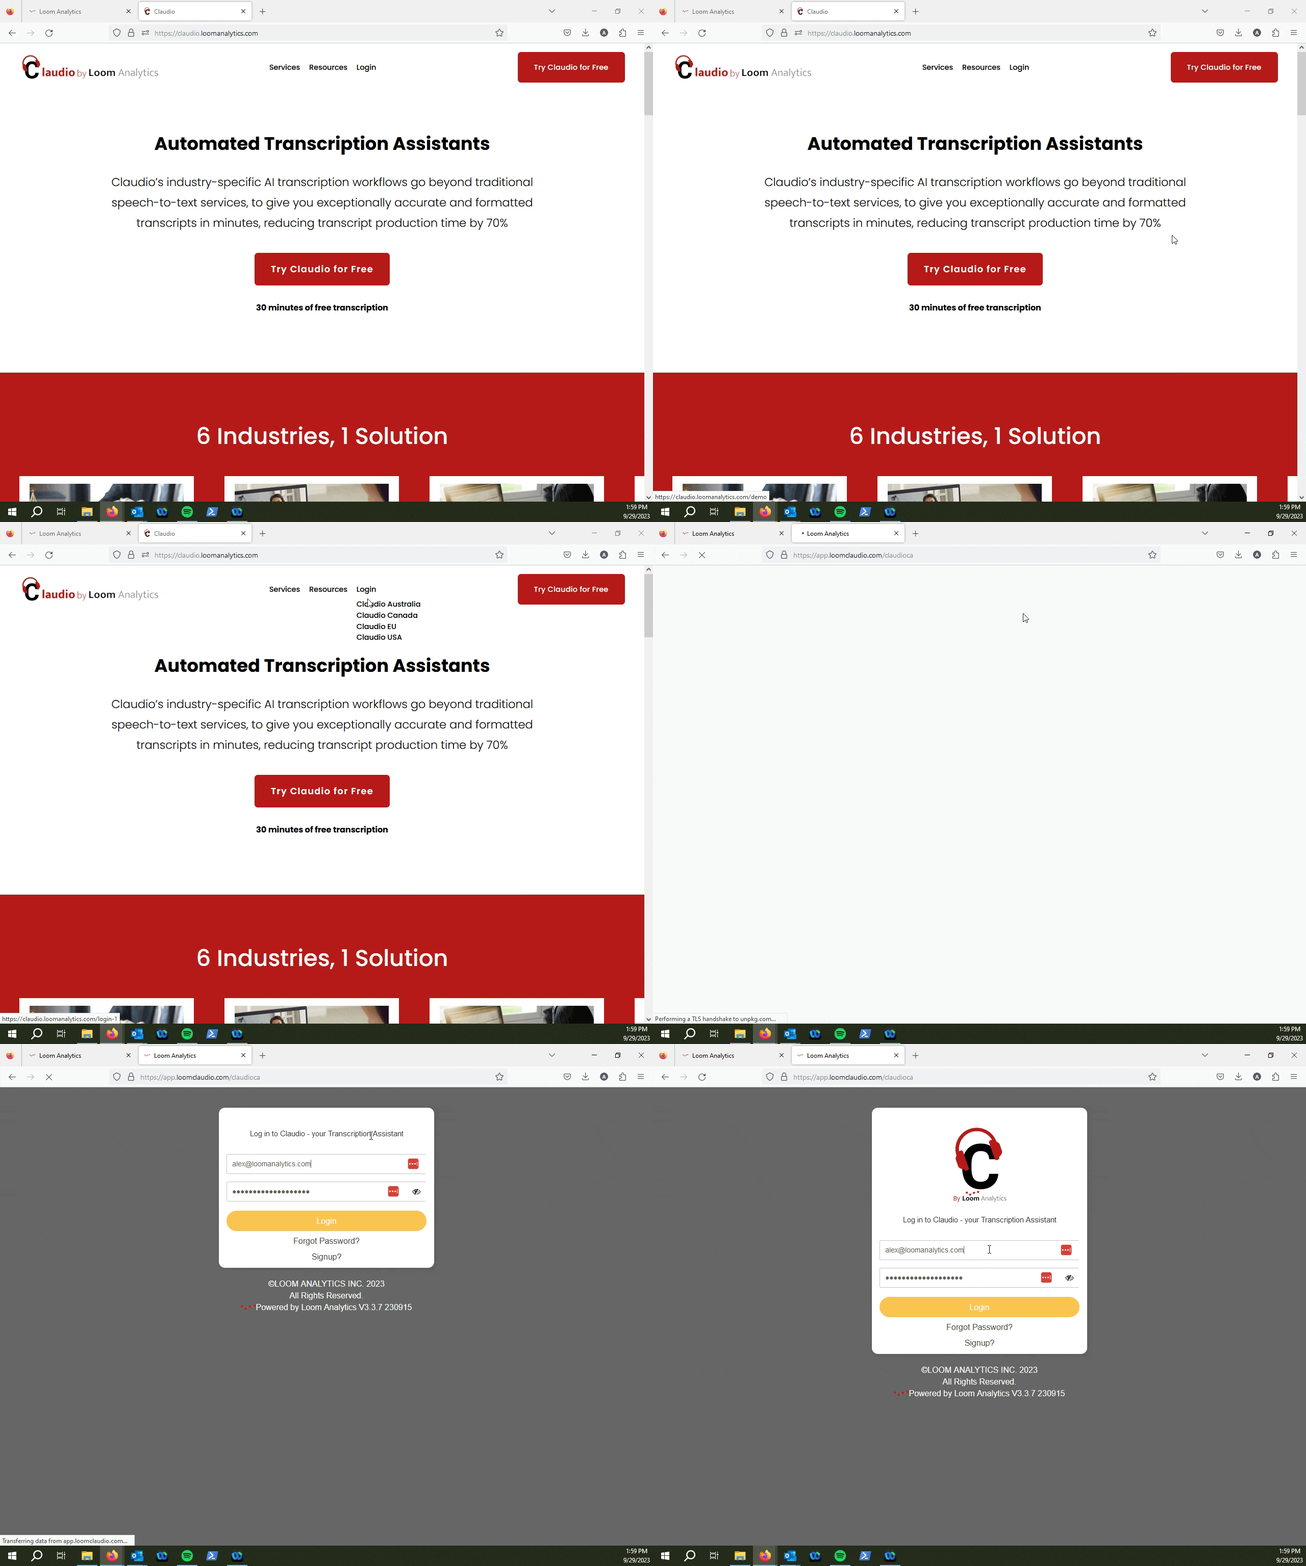
Log-in to Claudio
TIP: Click here to learn how to log-in to your Claudio account.
Find the "Ontario ACT Transcript Request Form" under the Advanced Transcript Request field on your Dashboard.
Click "View".
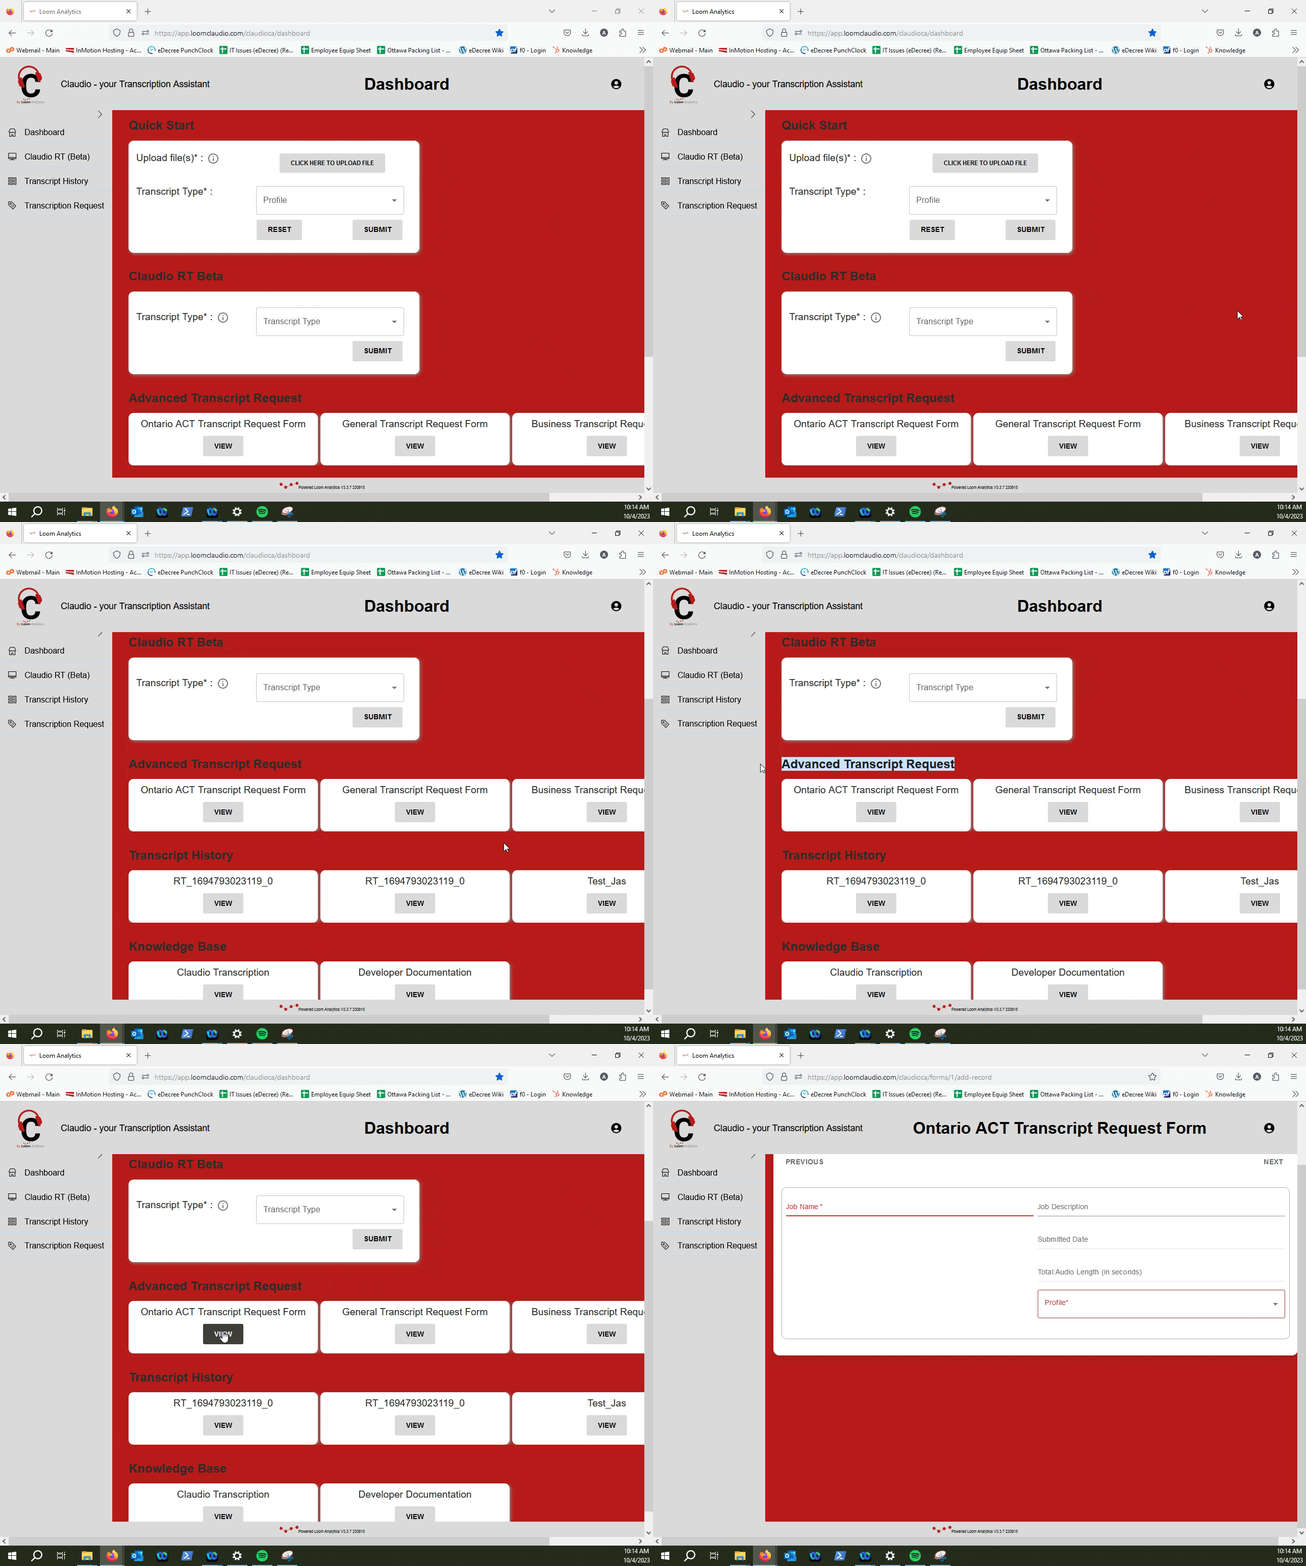
Fill out the "Job Name" field and select a profile that suits your needs.
If you want to provide a description, you can do so over on the "Job Description" field.
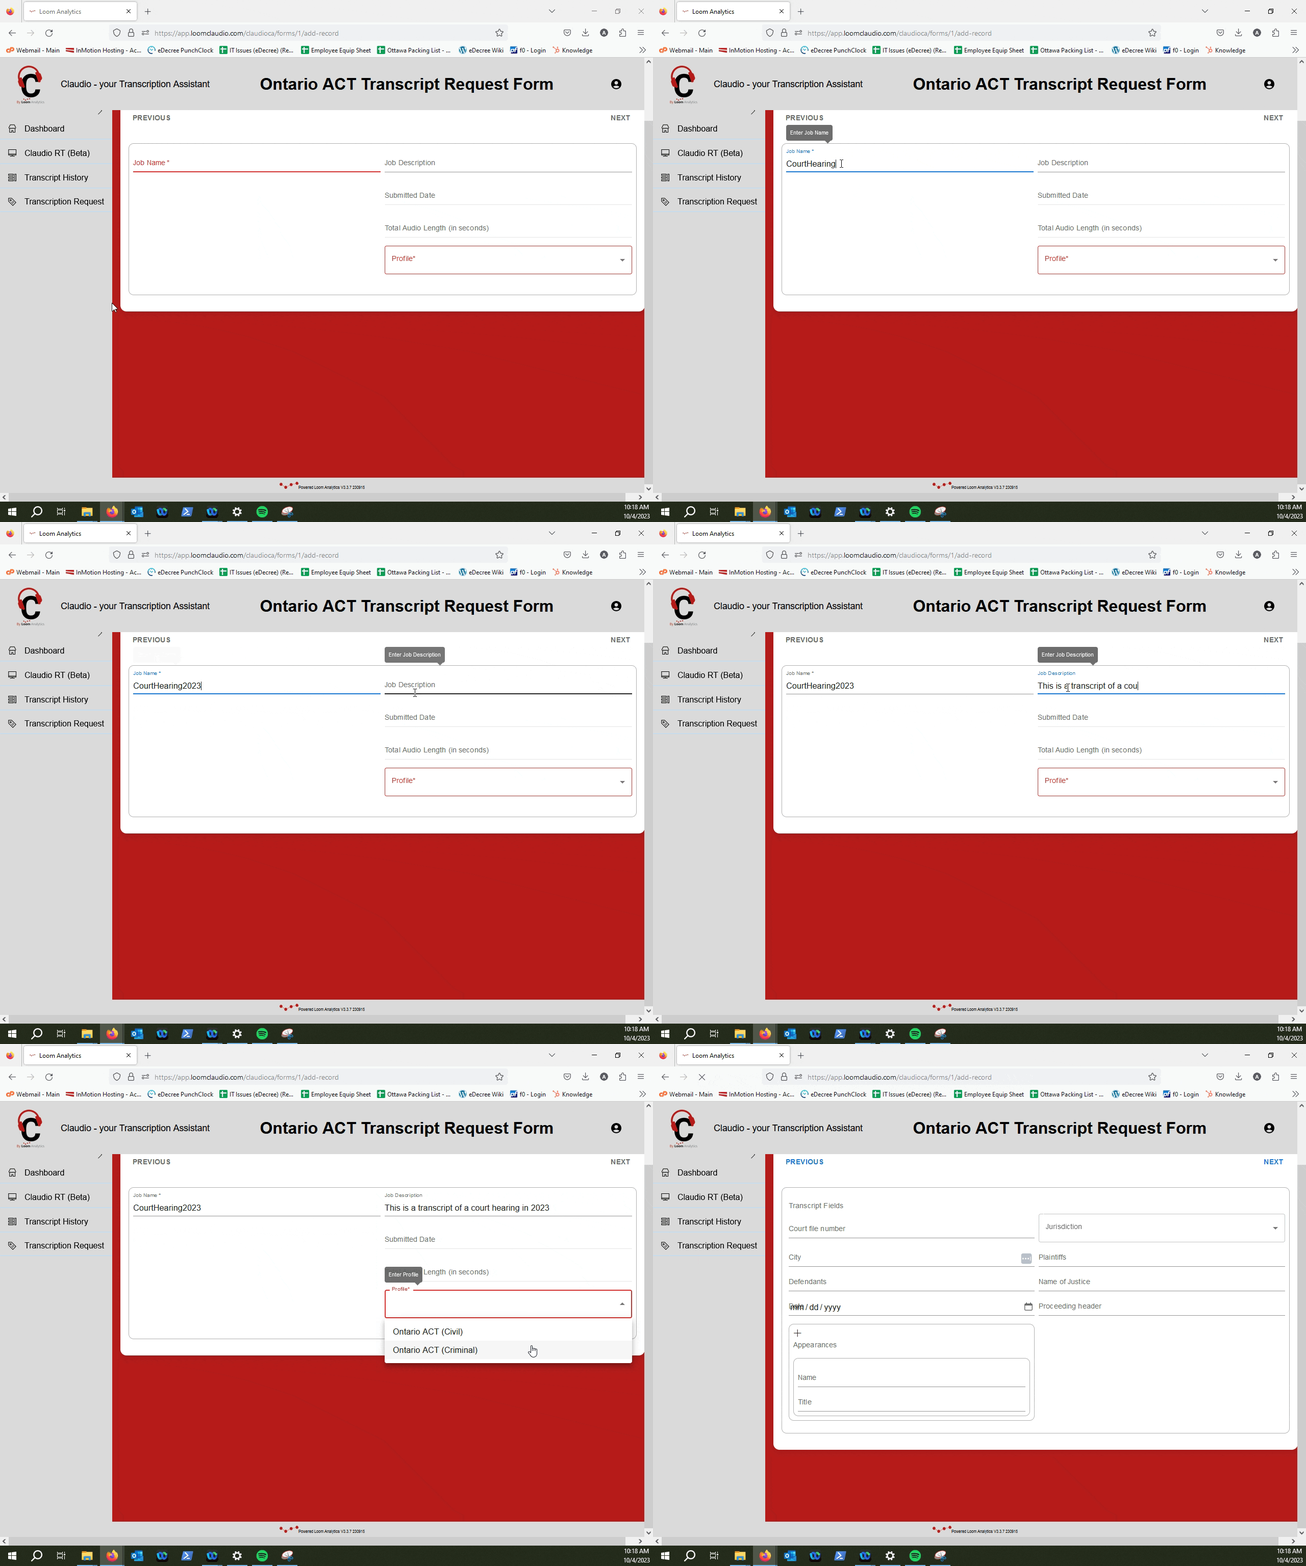
NOTE: You can learn more about which profiles Claudio supports, here.
The next form will need to be filled out according to the information that is on your Order for Court Transcript of an Ontario Court Proceeding form.
Fill this section out accordingly, and then press "Next".
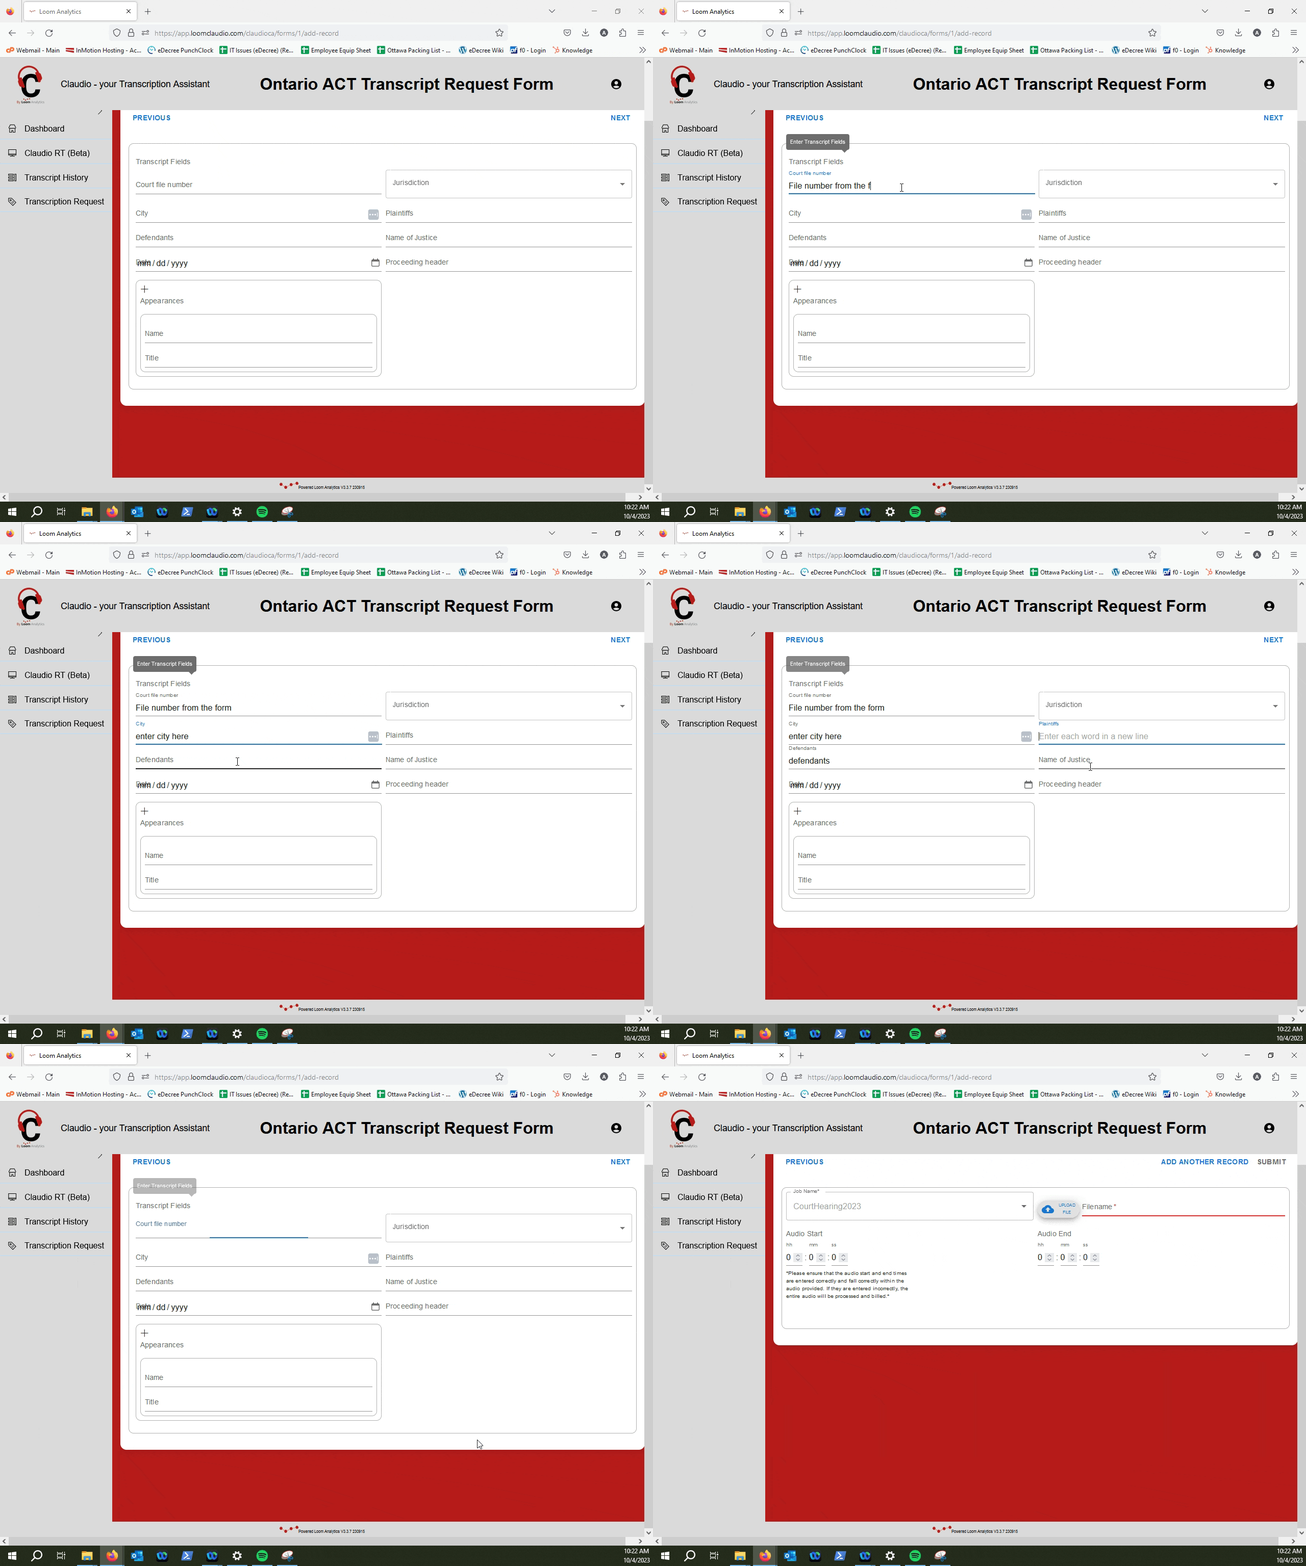
CAUTION: This section can only be filled out if you have a completed Ontario Court Proceeding Form. Please refer to the form for the details.
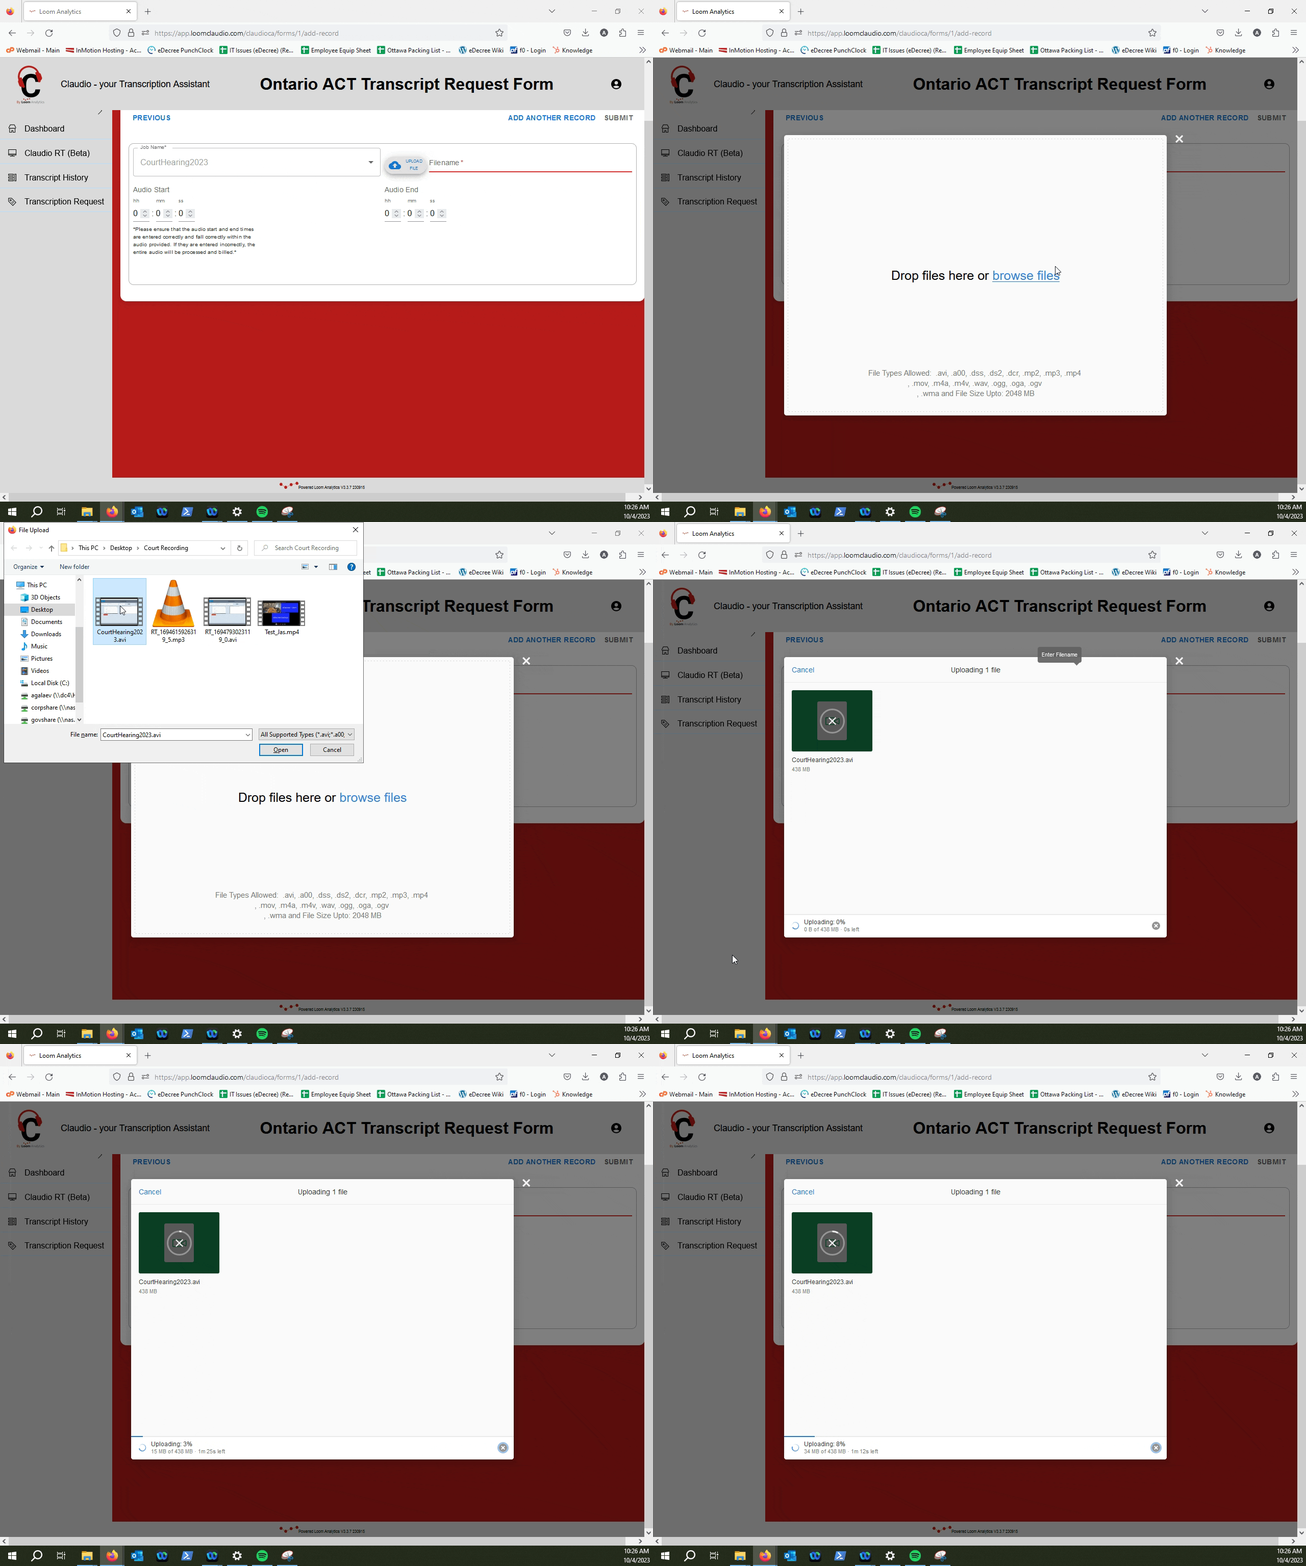
Select your recording of the court proceeding, then click "Upload File".
NOTE: If you need to upload multiple files to a single job, you can learn how to do that here.
If you need information on which file types Claudio supports, click here.
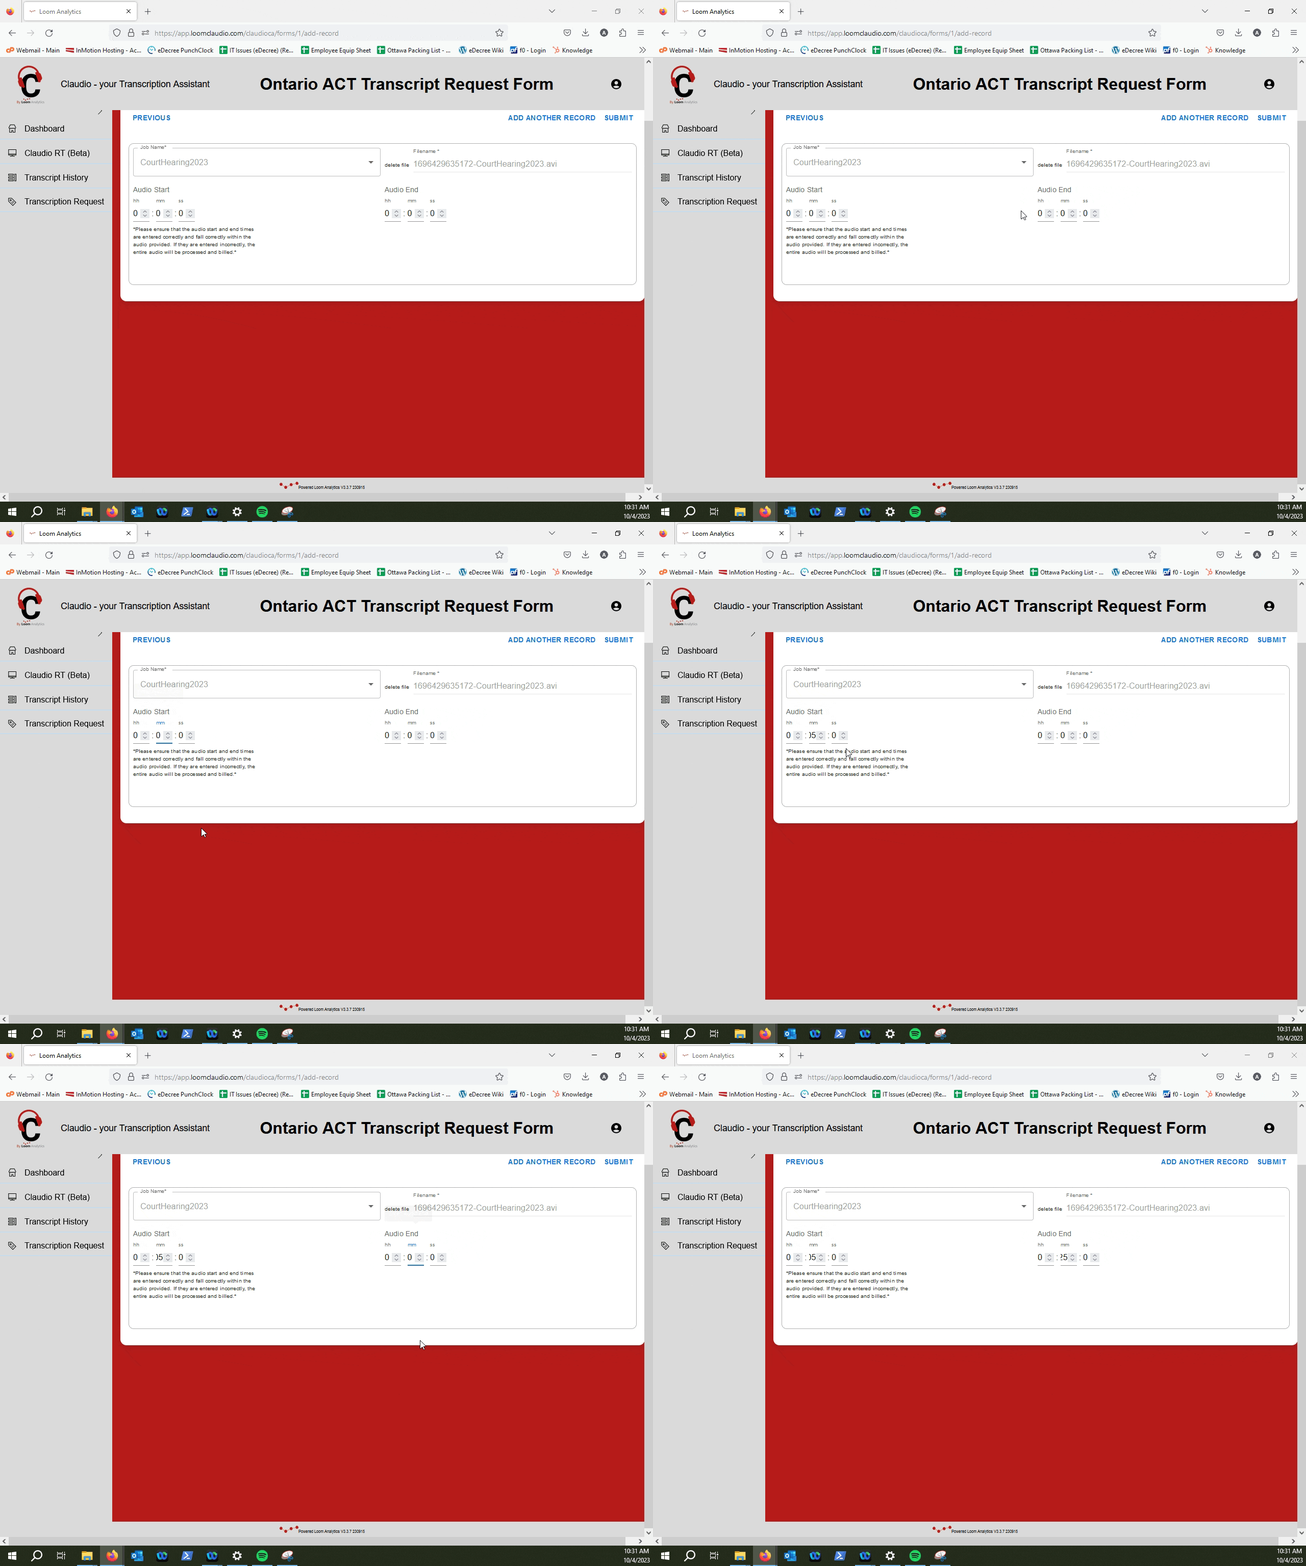
You can also modify where the transcription should start and where it should end by changing the "Audio Start" and "Audio End" values.
TIP: You can learn more on modifying transcript start and end times, here.
Once you have set everything to your specific needs, click on the "Submit" button.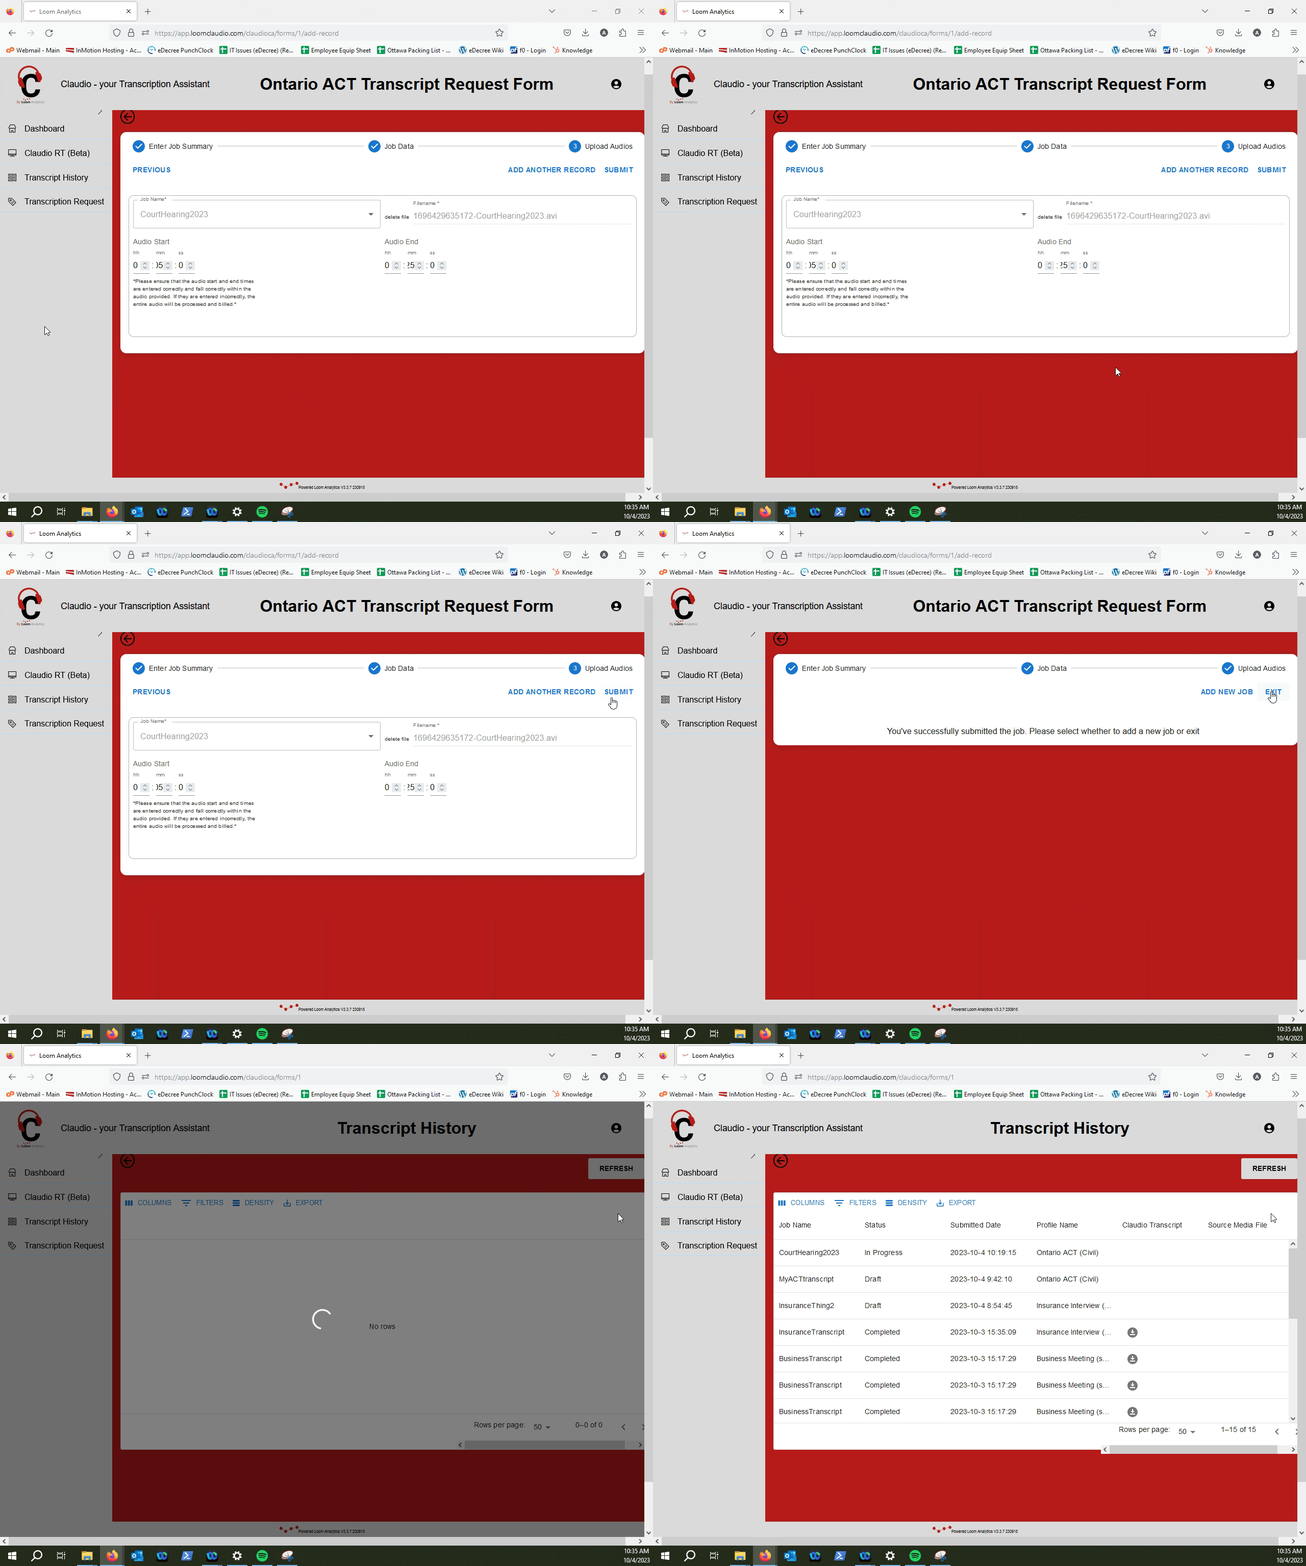
NOTE: To learn how to track the progress of your transcription jobs, and to retrieve your finished transcripts, click here.
