Creating a custom transcript profile in Claudio allows you to tailor your transcription settings to suit specific needs.
Note: Only Team Admins have the ability to create and edit custom transcript profiles. Once created, these profiles are accessible to all users within the team for use, but only the Team Admin can modify their settings.
Accessing the Custom Transcript Profile Setup
- Log in to Claudio: Start by logging into your Claudio account.
- Navigate to Profile Settings: From the top menu bar, click on the Gear icon to access your admin settings, then click "Profile".
In the Profile Overview page, you'll be able to see a list of all the default Claudio profiles as well as any of your custom and archived profiles.
Continue reading below for a step-by-step guide on how to create a custom profile.
Prefer visual learning? Watch the video below for a quick demo:
Step-by-Step Guide: How to Create a Custom Profile
Creating a Custom Profile
 To create a custom profile, you must create a duplicate of one of the default profiles. We recommend choosing the one that's most similar to the profile you're trying to create or simply duplicating the "General Transcription" profile. Follow these steps to duplicate it:
- Click on a default profile. This will open the profile editor.
Note: default profiles cannot be edited. - Click the "Clone" button at the top. A pop-up should appear.
- In the pop-up, enter a name for your new custom profile, then click "Clone Now".
- You will be taken to the profile editor, where you can now configure your custom profile's settings.
Basic Information

- Profile Name: Enter a unique name for your custom profile. This will help you easily identify it among other profiles.
- Profile Description: Provide a brief description of the profile. This is optional but useful for noting the specific purpose or client the profile is designed for.
Capitalization Settings
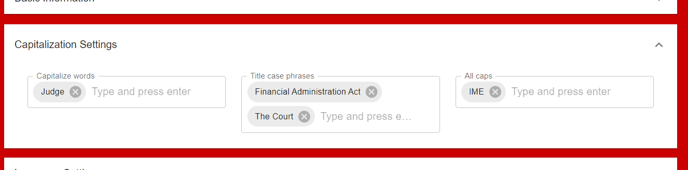
- Capitalize Words: Enter any specific words that you want to automatically capitalize in your transcript. Only the first letter of these words will be capitalized.
Example: If you enter "transcript," it will appear as "Transcript" in the final document.
- Title Phrases: Input phrases you want to be in title case. The first letter of each word in these phrases will be capitalized.
Example: If you enter "annual report," it will be formatted as "Annual Report."
- All Caps: List any words you wish to be entirely capitalized in your transcript. These words will appear in all capital letters.
Example: Enter "URGENT" to have it appear as "URGENT" throughout the transcript.
Language Settings
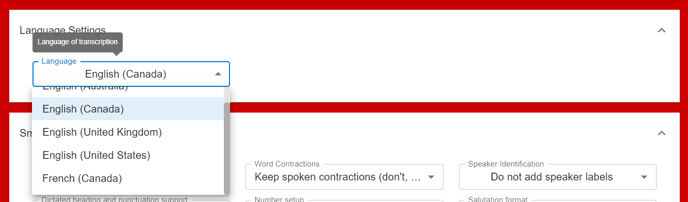
- Choose Language: Select the regional language in which you want the transcript to be generated.
You can now update your language settings to receive only grammar-corrected text, with the option to disable the display of source text. For more details, click here.
Smart Format
Smart Formatting allow you to fine-tune how your transcript will appear.
 The options include:
- Sentence Spacing: Set your preferences for spacing between sentences (e.g. single space or double).
- Word Contraction: Choose whether to contract or expand words based on the context (e.g. don't or do not).
- Speaker Identification: Add speaker label placeholders to separate each speaker in the audio file.
- Dictated Headings & Punctuation Support: Select whether you want Claudio to automatically format dictated headings and punctuation in reports.
- Number Setup: Set your preferred format for numbers (e.g., numerals or words).
- Salutation Format: Choose how salutations should appear (e.g., with periods or without).
- Time Setup: Select how you want times to be formatted (e.g. a.m/p.m. or AM/PM).
- Grammar Ready: Enable grammar correction to ensure the transcript is error-free.
- Closed Captioning: Configure whether you want Claudio to also generate subtitle files (not available for medical profiles).
- Speaker Pauses: Choose whether you want to keep or remove speaker pauses (e.g. umm or ehh).
- Date Format: Select your preferred date format.
Learn more about each formatting option here.
Templates
 In this section, you can upload multiple templates for a single profile. This is especially handy for special use cases or when working with unique client requests.
Choose which template should be set as the default option. This template will be used automatically unless you specify otherwise.
After uploading templates, select the template(s) you wish to use for generating the transcript. If your profile has multiple templates, ensure that at least one is selected before proceeding.
Finalizing Your Custom Transcript Profile
Once you have configured all the settings, review your custom profile to ensure everything is in order. When you're satisfied with the setup:
- Save Your Profile: Click 'Update' in the top right to save your custom profile settings. You can also do by clicking the "In Draft" button at the top left and toggling it to "Published".
- Test the Profile: Consider running a test transcript to make sure that the settings work as expected.
And that's it! You’ve successfully created a custom transcript profile in Claudio.