What are "Styles" and how can I create them?
This articles will provide an overview of what Styles are in Microsoft Word, as well as a simple guide on how you can create your own document styles to fit your needs.
Table of Contents.
1.What are Styles?

2.Creating a new Style in MS Word.

3.Editing the Style formatting.

4.Applying the new Style.
"Styles" are a very useful tool within Microsoft Word that can help you format your document in just a couple of clicks instead of choosing and picking the format settings for each portion of the document.
If you have used Microsoft Word you may have noticed, in the Ribbon, Word provides some default "styles" for you to use when formatting a document.
NOTE: These are some of the default "Styles" that Microsoft Word comes installed with. These can be changed or serve as a basis for a custom style that you can create on your own.
So, what are Styles?
Styles are a way to apply your custom formatting settings to a particular piece of your document. Let's for example say we want to create a paragraph style, that aligns all items to the left and is double-spaced. Let's look at how we can do that in the guide below;
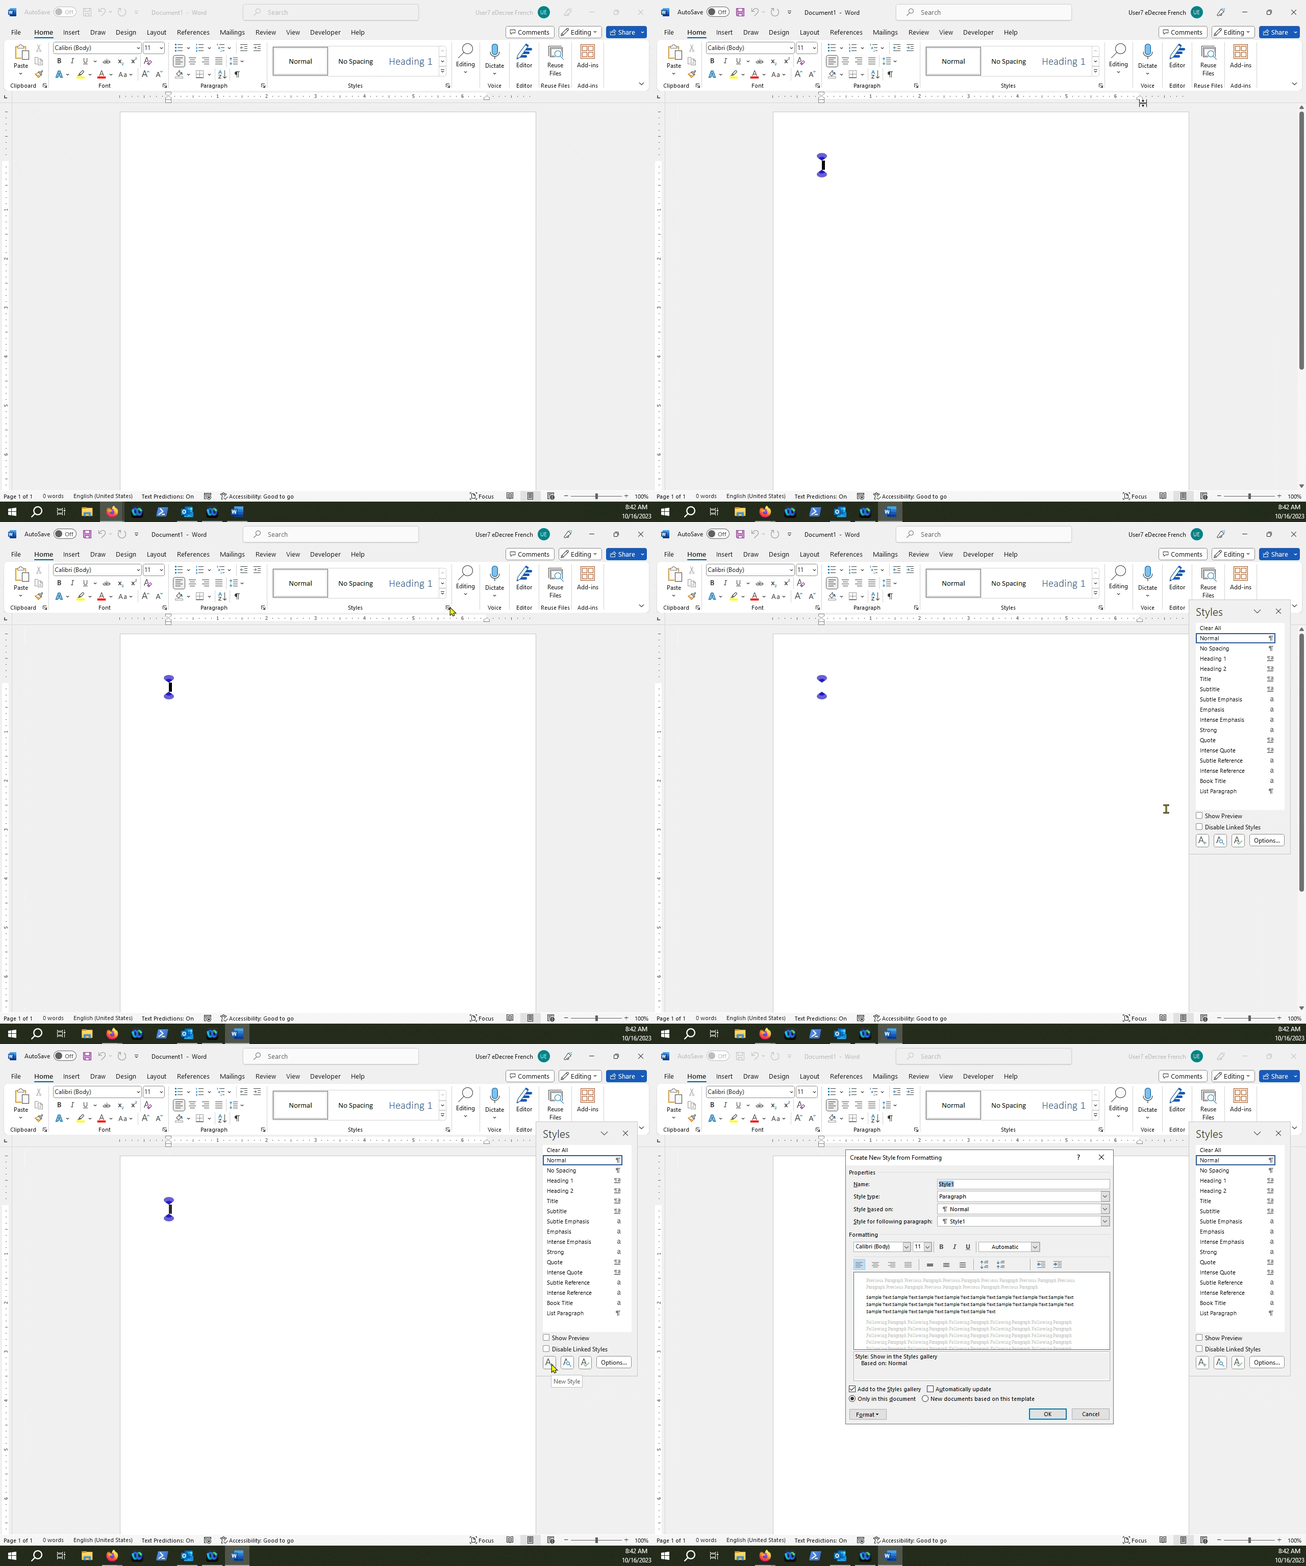
To create a new Style, click on the bottom right corner arrow of the Styles pane and select "Create A Style".

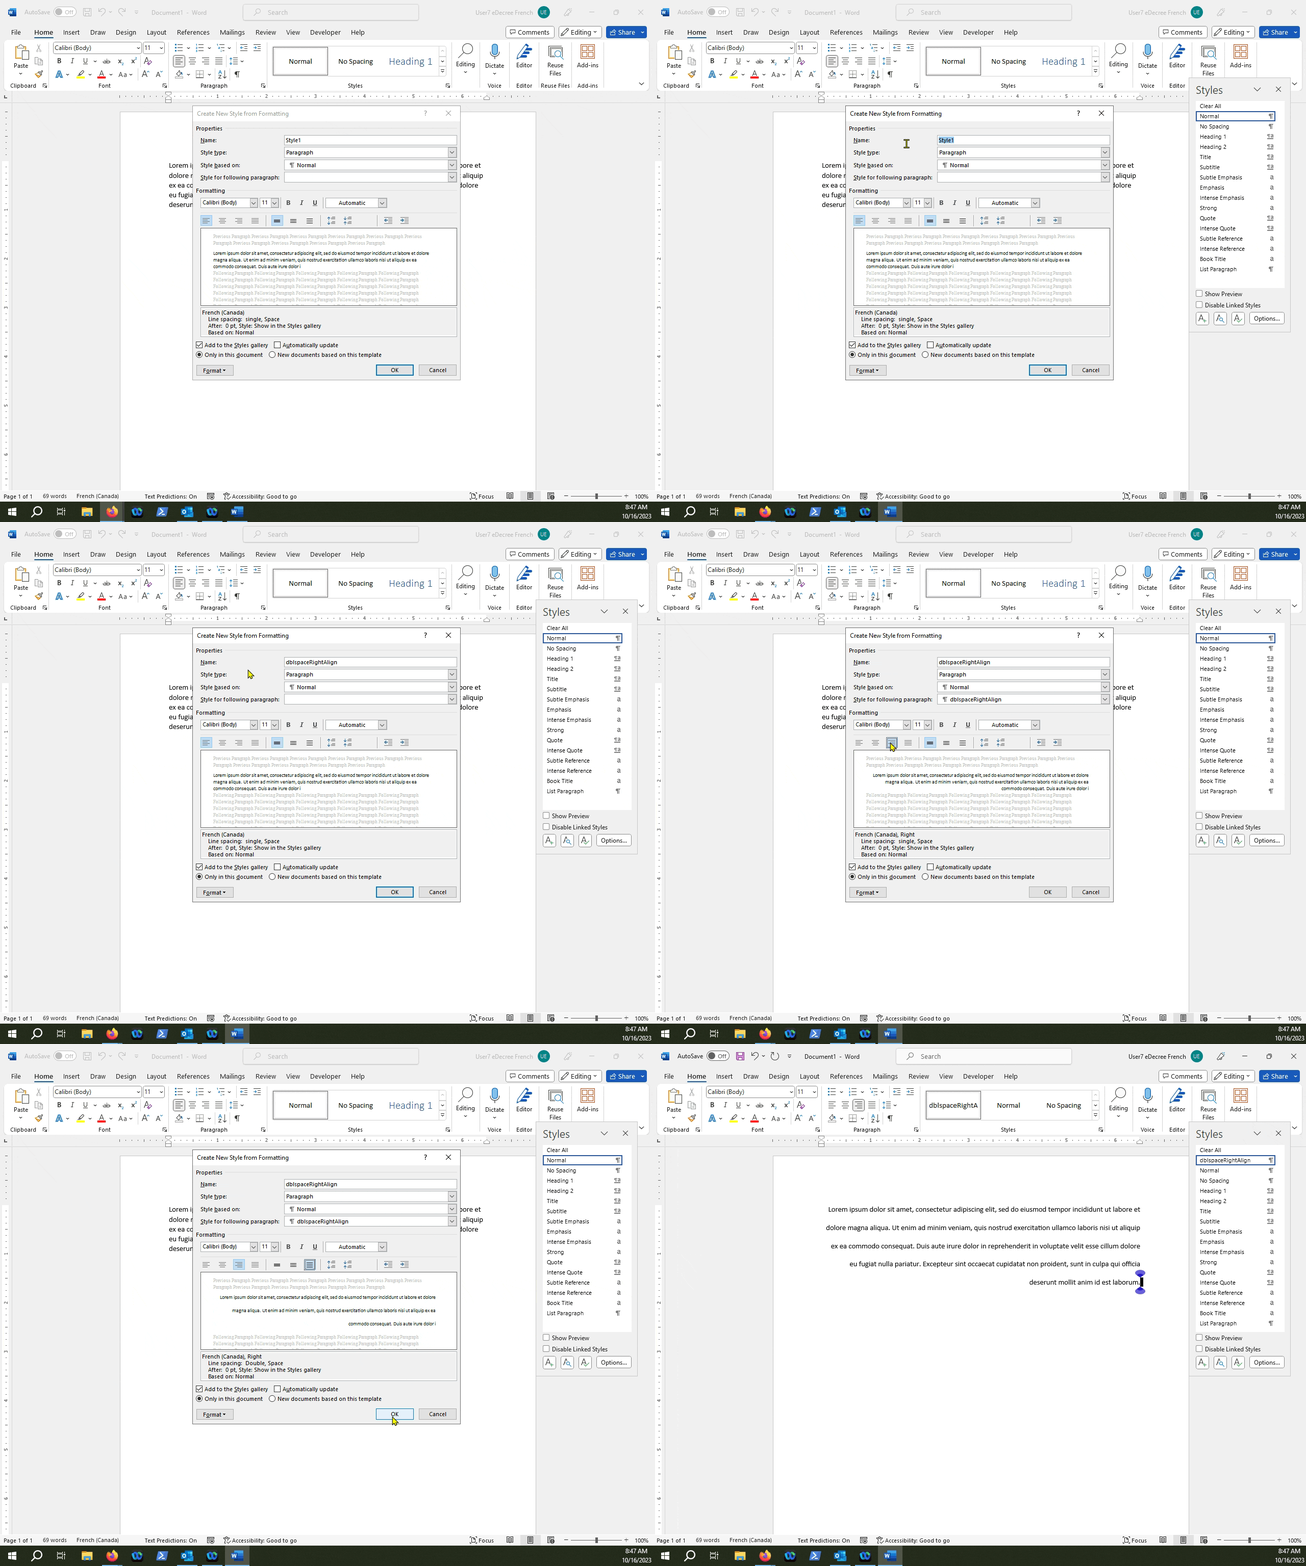
Let's create a new style that will apply double-spacing and align text to the right. Let's call our new style "dblspaceRightAlign".

NOTE: Notice that when you create a new style, it will automatically apply to the document. You can also highlight a section of your document, create a new style and the changes will apply to that highlighted section.
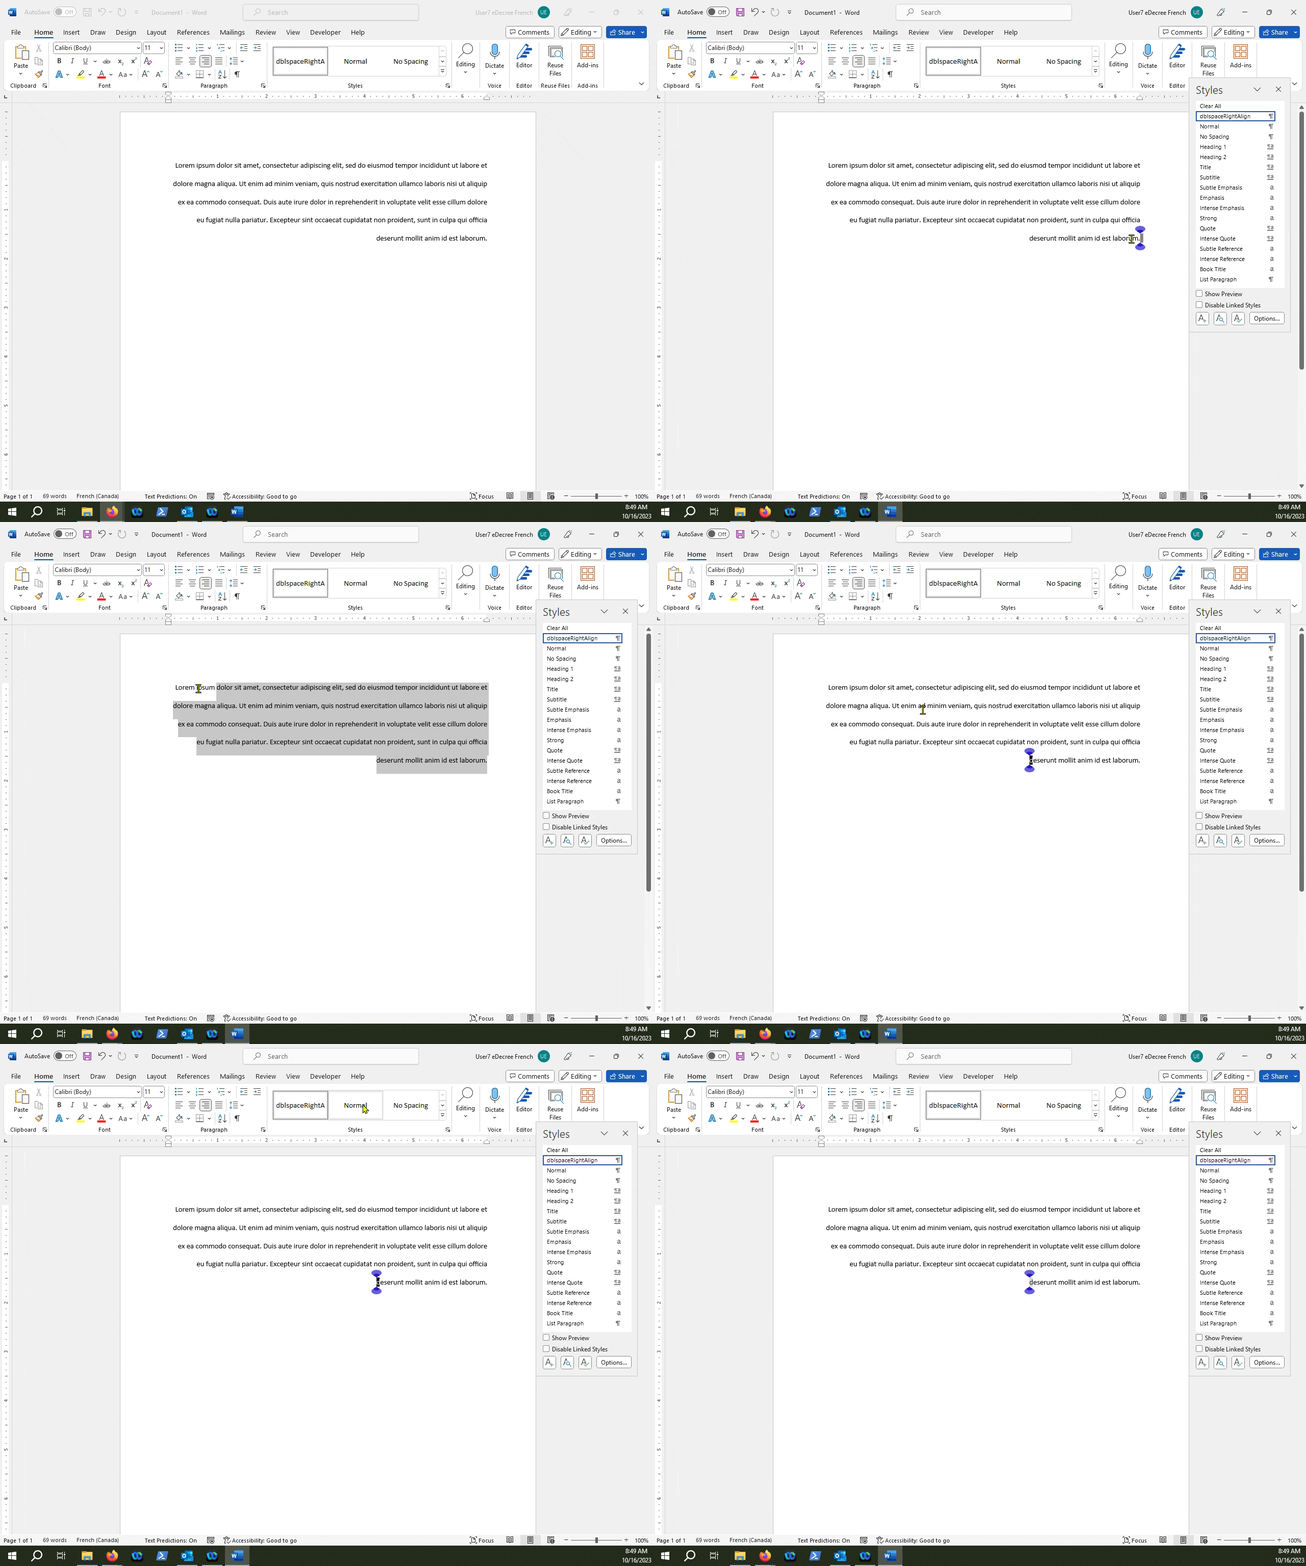
Your new custom Style will now show up in the Styles Pane.

You can always de-apply the new style with something else by selecting the text and then selecting a different style in the Styles Pane.

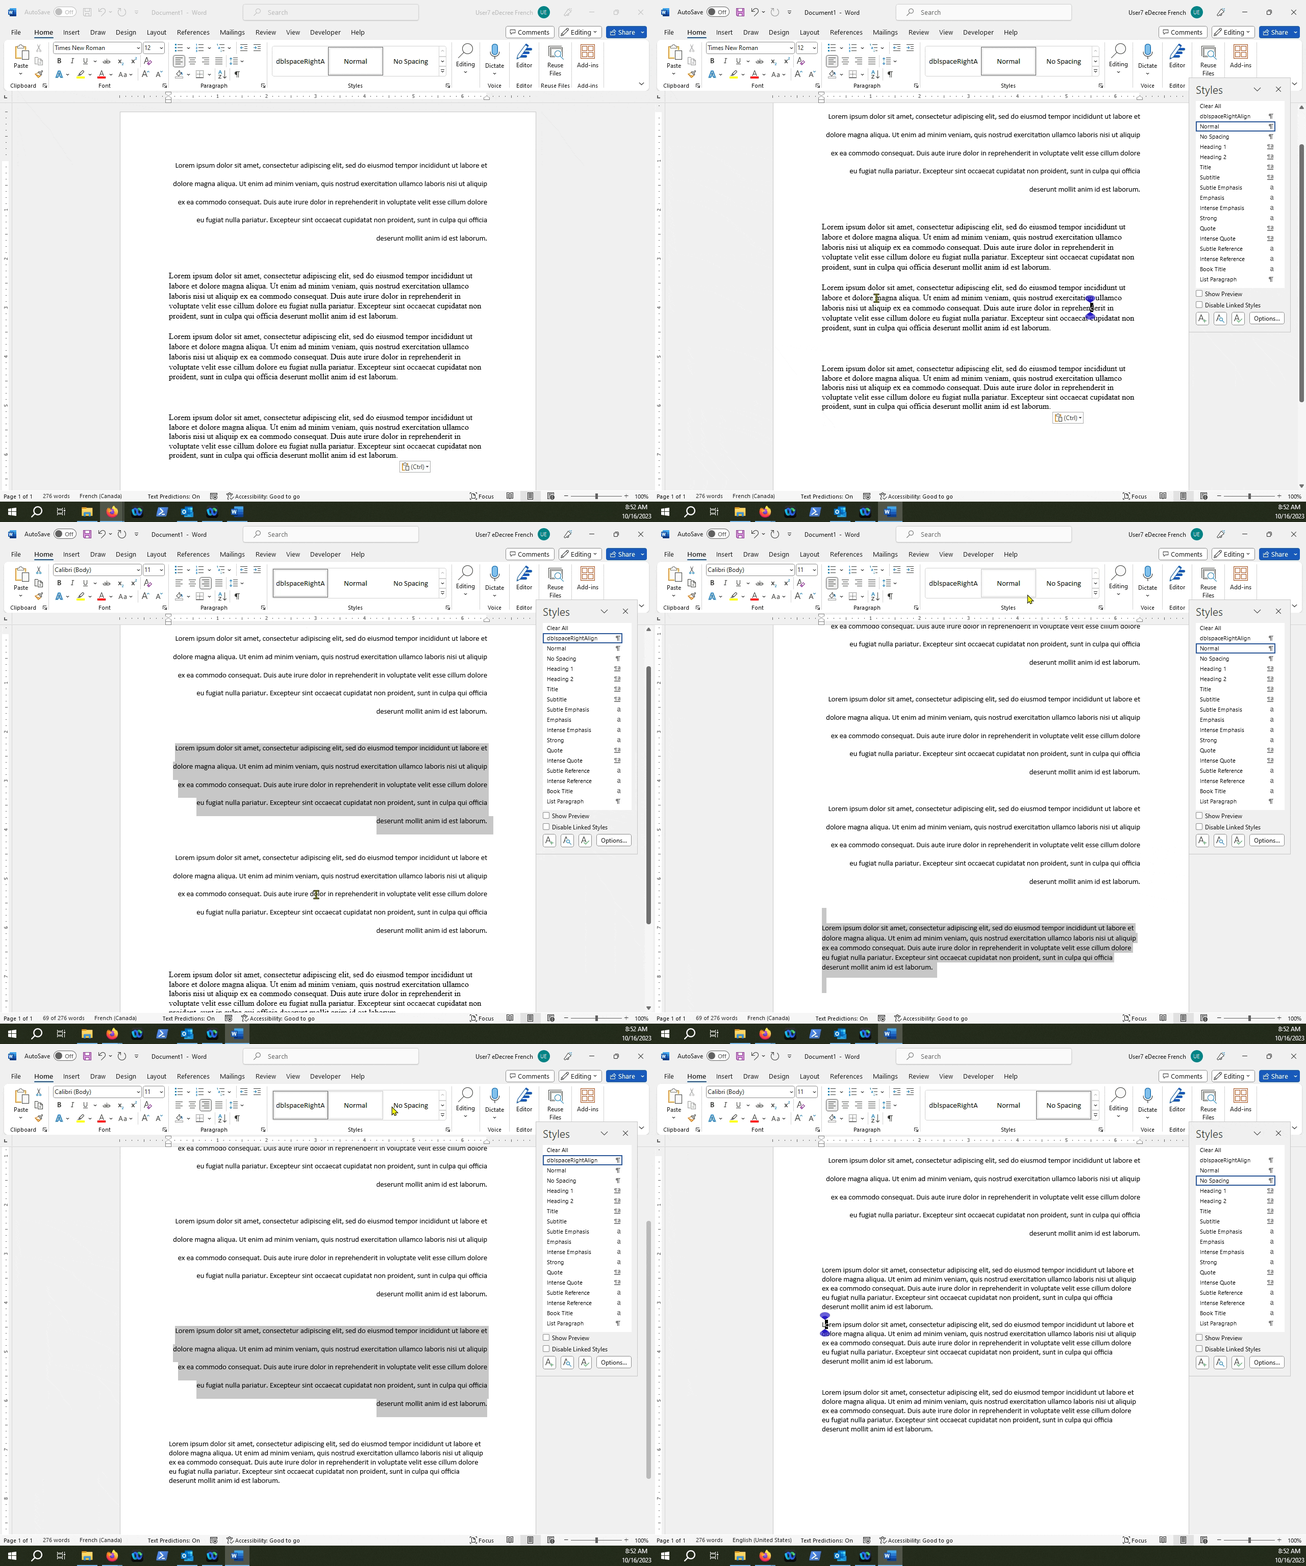
CAUTION: Before applying a new style to a separate paragraph or section of a document, play around with the spacing as sometimes a new style could be applied to an unintended element of the document if they are spaced too closely together.