![Loom_Analytics_Logo_Transparent.png]](https://support.loomanalytics.com/hs-fs/hubfs/Loom_Analytics_Logo_Transparent.png?height=40&name=Loom_Analytics_Logo_Transparent.png)
This guide will walk you through the process of changing headers in an MS Word document, specifically tailored to meet the requirements for ACT's transcripts. By following these steps, you’ll be able to update headers for different sections within a document without altering headers in preceding sections.
Step-by-Step Guide:
-
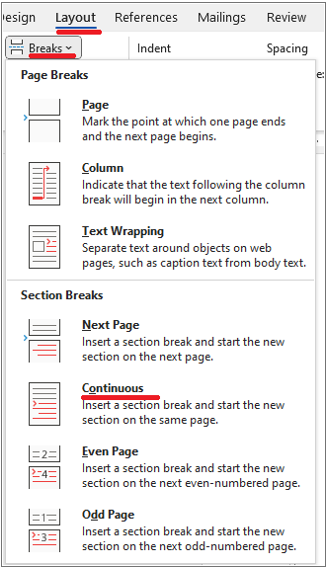
Insert a Continuous Section Break
- Go to the page before the header you'd like to change.
- Click on the "Layout" tab.
- Click on the "Breaks" dropdown menu.
- Choose "Continuous".
-
Access the Header
- Double-click within the header you'd like to change.
- Disable Link to Previous
- Under the "Header & Footer" tab, ensure that "Link to Previous" is not highlighted or selected.
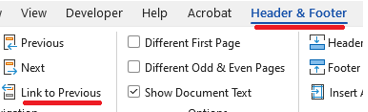
- Under the "Header & Footer" tab, ensure that "Link to Previous" is not highlighted or selected.
4. Modify the Header
- Now, you can edit the header for the current section without affecting the headers in previous sections.
If the Page Numbers Within the Headers Change After Inserting a Continuous Section Break:
-
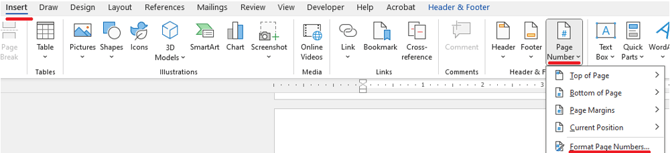
Double-click within the header where the page number changed.
- Click on "Insert"
- Click on the "Page Number" dropdown
- Click on "Format Page Numbers..."
-
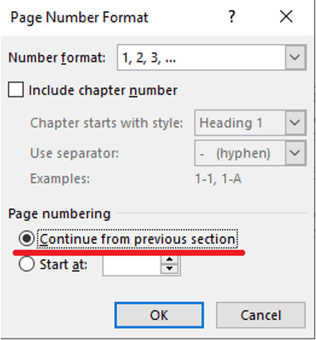
Ensure "Continue from previous section" is chosen.
Additional Resources:
- Discover how Loom Analytics Desktop simplifies transcription for Ontario ACT's: Click here to learn more
- Discover how Loom Analytics Desktop simplifies transcription for Nova Scotia ACT's: Click here to learn more
- How Can I Request an ACT Transcript Through Loom Analytics?
- How Do I Edit a Loom Analytics ACT Transcript?
- Where Can I Find the Hotkeys & Macros for the Ontario ACT Template?