Overview
Pay-As-You-Go (PAYG) clients add funds by topping up their Wallet on Loom Analytics Web with a credit card. One Wallet balance pays for transcription across all Loom Analytics products:
- Loom Analytics Web
- Loom Analytics Desktop
- Loom Analytics Desktop – Hermit
This applies to both Realtime and Batch transcription. Usage is charged per minute of audio and deducted from your balance as each job runs.
Before You Begin
- You need your Loom Analytics Web email address and password. Desktop and Hermit use the same login.
- Have a credit card ready. Payments are processed through a secure Stripe checkout.
- Amounts are shown in your account’s currency (e.g., CAD).
- If your account is invoiced rather than prepaid, then you won’t see a Top up button. See Troubleshooting and FAQ below.
Add Funds to Your Wallet
- Log in to Loom Analytics Web.
- Open your Wallet.
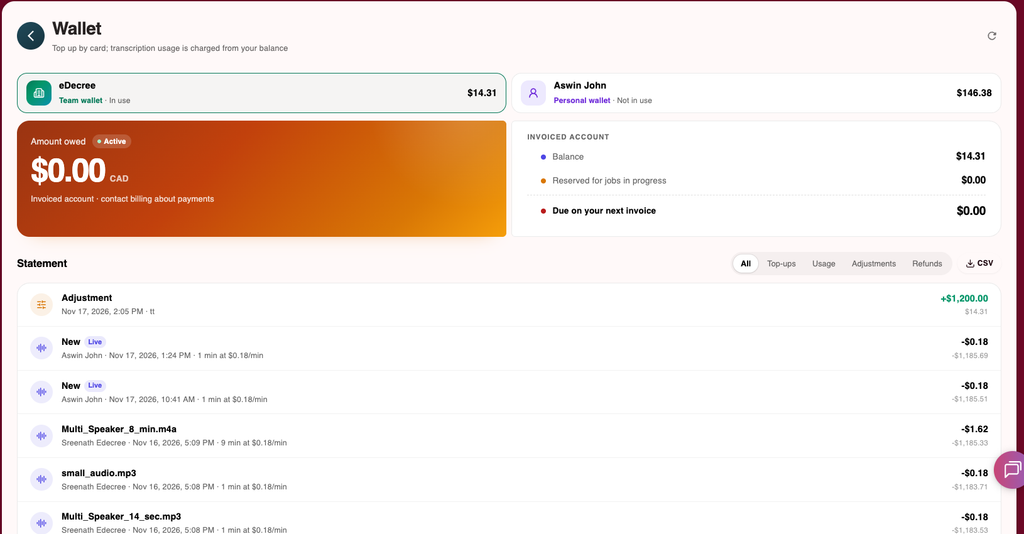
- At the top of the page, select the wallet you want to top up. A Team wallet is shared by your organization; a Personal wallet is yours alone. The wallet marked In use is the one charged for your transcription.
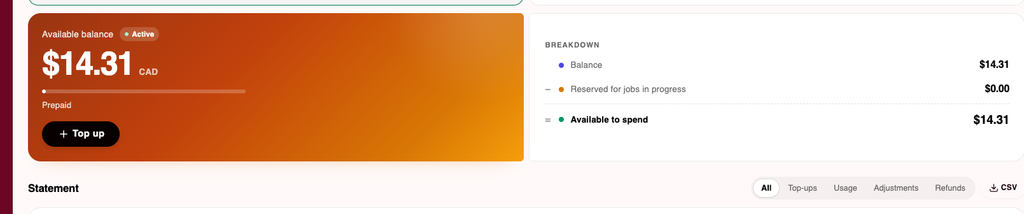
- On the Available balance card, click + Top up.
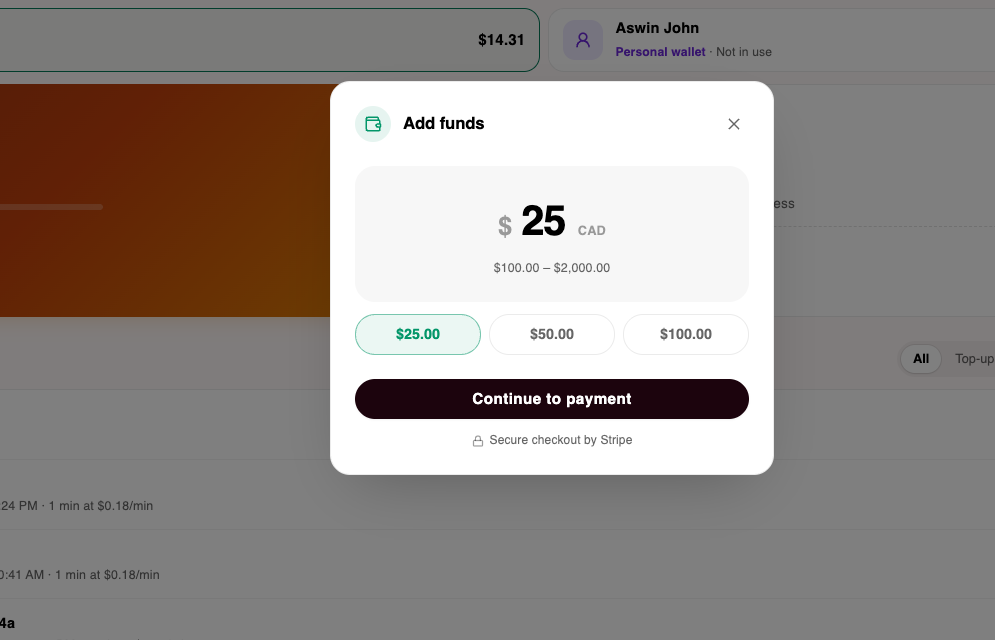
- In the Add funds window, type an amount or choose a preset ($25.00, $50.00, or $100.00). The allowed range is shown below the amount.
- Click Continue to payment. A secure Stripe checkout page opens.
- Enter your card details and complete the payment.
- Return to your Wallet. If your new balance doesn’t appear right away, then click the refresh icon in the top-right corner.
The Available balance card with the + Top up button:
The Add funds window:
Your top-up is listed in the Statement under Top-ups, and the funds are ready to use right away in all Loom Analytics products.
Check Your Balance & Statement
The Breakdown panel beside your balance shows what you can spend right now:
| Line | What it means |
|---|---|
| Balance | The total funds in your wallet |
| Reserved for jobs in progress | Funds set aside for jobs that are still running |
| Available to spend | Your balance minus reserved funds |
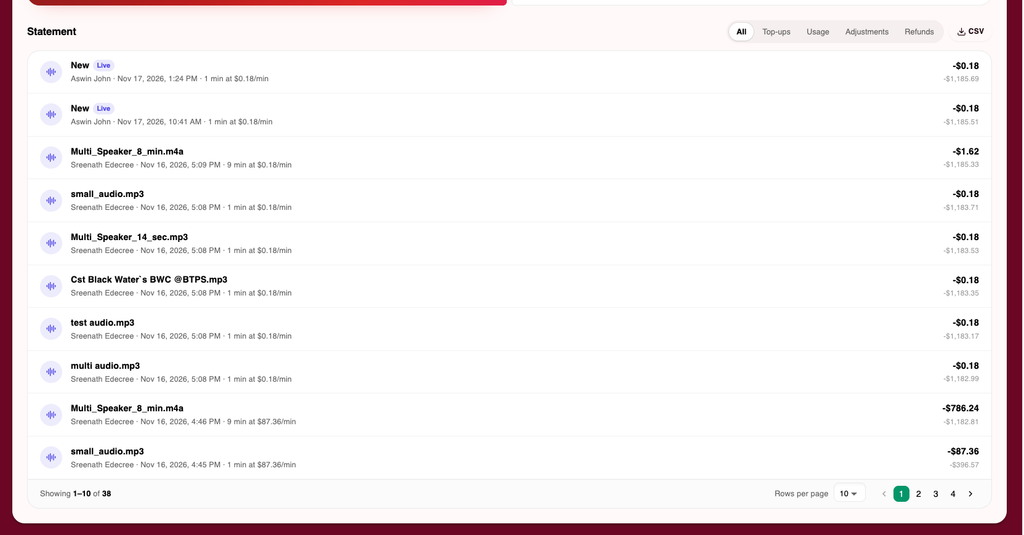
The Statement below lists every transaction, newest first. Each entry shows the job or file name, who ran it, the date and time, and the minutes charged at your per-minute rate. The amount and your running balance appear on the right. Entries tagged Live are Realtime sessions.
- Use the filters to show All, Top-ups, Usage, Adjustments, or Refunds.
- Click CSV to download your statement.
- Use Rows per page and the page numbers at the bottom to browse older entries.
Using Your Funds Within Desktop & Hermit
Loom Analytics Desktop and Loom Analytics Desktop – Hermit draw on the same Wallet balance, so you add funds on Loom Analytics Web for those products too. To bring a new top-up into either application:
- Make sure your computer is connected to the internet.
- Open the application and click Settings.
- Select Payment.
- Click Refresh from Online. Your updated balance appears at the top right of the Payment section.
Hermit works offline, so remember to connect and refresh after each top-up before you disconnect again.
Troubleshooting & FAQ
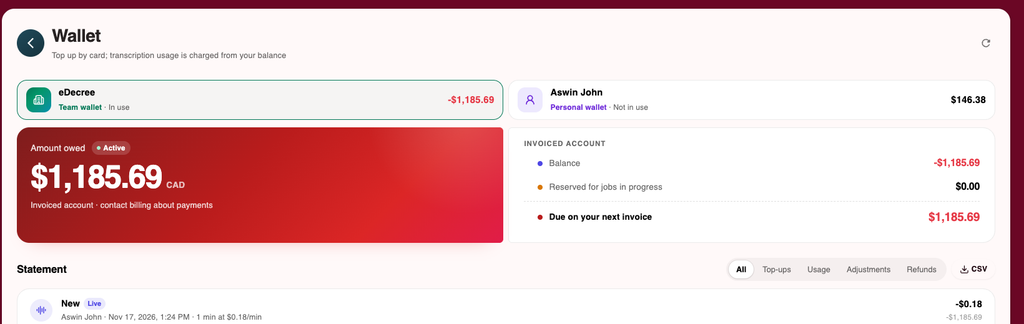
My Wallet shows “Amount owed” and there’s no Top-up button.
Your account is invoiced, not prepaid. Usage is added to your next invoice, shown as Due on your next invoice. Contact our billing team to make a payment.
I paid an invoice. Where does it show?
Once billing records your payment, it appears in your Statement as an Adjustment, and your balance is updated.
My balance didn’t change after I paid.
Click the refresh icon in the top-right corner of the Wallet. In Desktop or Hermit, click Refresh from Online under Settings ▸ Payment.
Why is my available balance lower than my balance?
Funds for jobs still in progress are reserved until those jobs finish.
Which wallet gets charged?
The wallet marked In use at the top of the Wallet page.