To print to ASCII from MS Word, you will need to install a Generic Text Only Printer on your computer. The steps below explain how to do this:
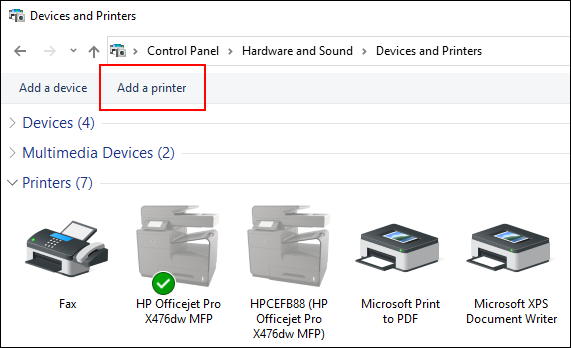
To add the Generic Text Only Printer driver, go to Control Panel > Devices and Printers. From there, click "Add a printer" button on top.
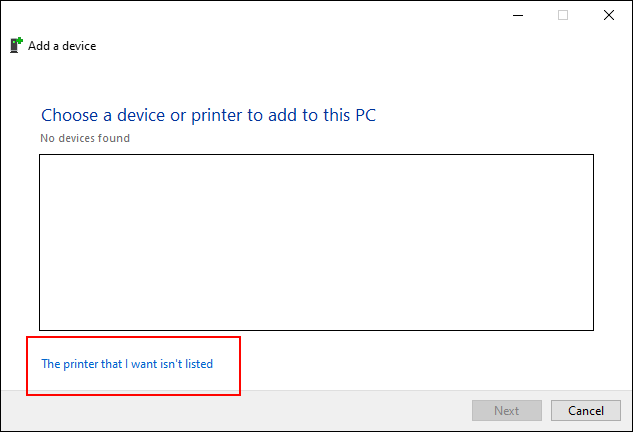
Wait until list of printers is loaded, and click "Printer I want is not listed", as in the screenshot below.
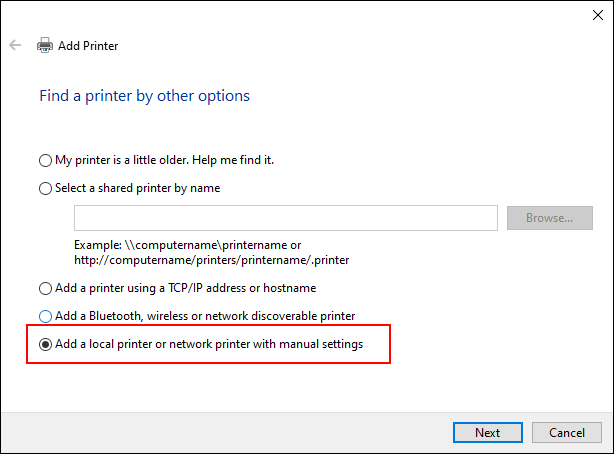
In next screen, select "Add a local printer or network printer with manual settings" and click "Next".
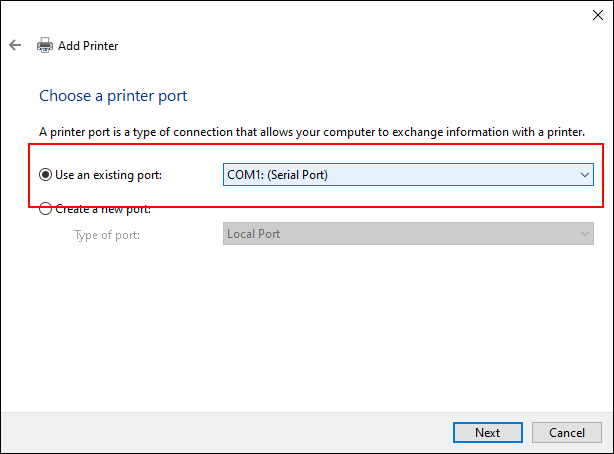
Next step is selecting a correct COM port for your printer. Within "Use an existing port" drop down select a port where your printer is physically connected and click "Next".
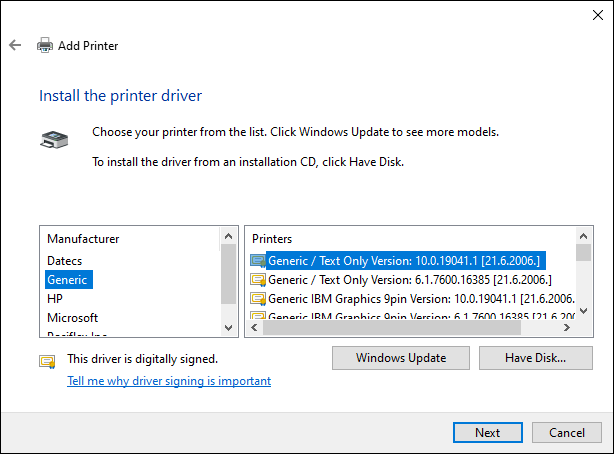
In next screen, you will be presented with the list of available printer drivers. Find "Generic" on the left, and select "Generic / Text Only" (use the latest version, if available). Once you have this printer selected, click "Next"
In case you had this printer driver installed before on your PC, you may see the screen asking you to keep existing driver or replace it with the new one. Select recommended option and click "Next".

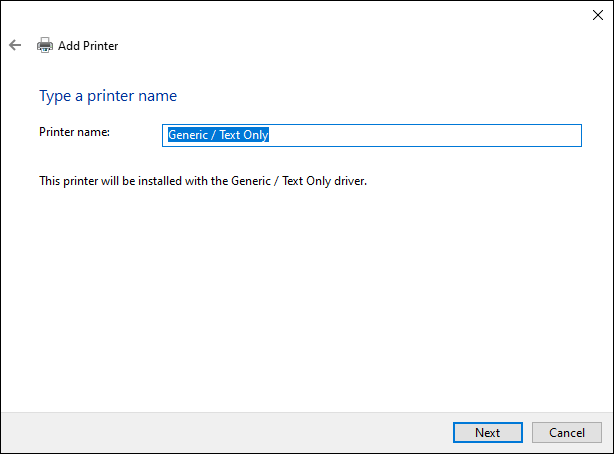
Type a printer name or leave it the default one (recommended) and click "Next"
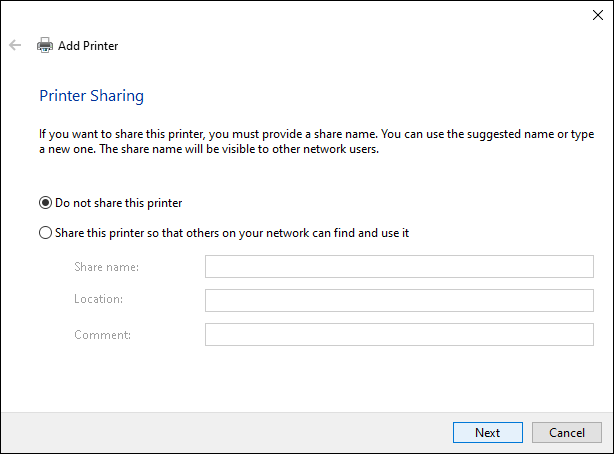
Once your printer driver is installed, you will see a screen asking you to share new printer on local network. Based on your preferences, if you wish to share the printer or no, select correct option and continue by clicking "Next" button.
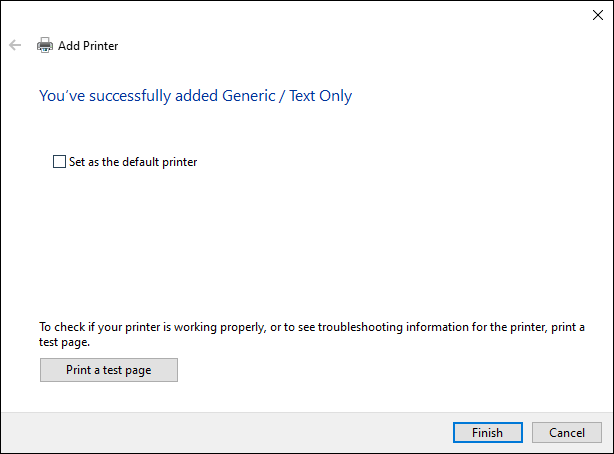
You have successfully added a printer. Click "Print a test page" to confirm it is working as expected and click "Finish" button to close the wizard.
After the printer is installed, when you print to this printer, it will save the file in ASCII format.