Capture Live Setup for Broadcast Events:
Capture Live enables live broadcasting with real-time captions for news, interviews, and similar applications. Follow steps below to configure this A/V setup.
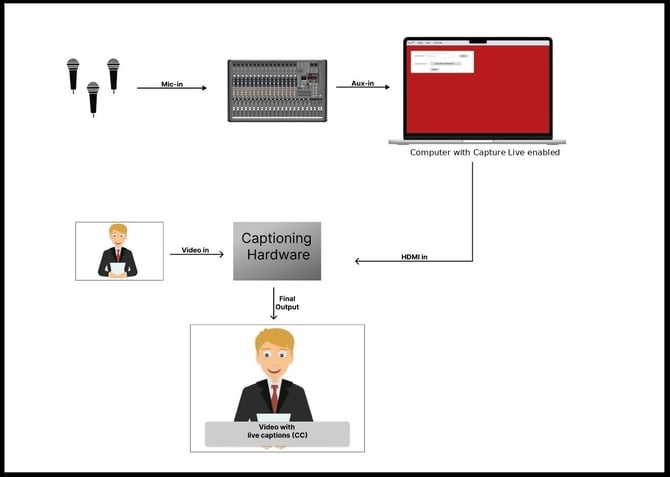
Step 1: Connect Microphones to Audio Mixer
-
Connect multiple microphones to the audio mixer to manage various speakers and audio sources.
-
The mixer controls input levels, balances audio, and maintains sound quality throughout the event.
Step 2: Route Audio to Live Capture
- Connect the audio mixer's auxiliary output to your desktop or laptop's auxiliary input.
- The computer runs Live Capture, a web application that provides real-time transcription from your audio sources.
- Configure Live Capture with Green Screen enabled for dynamic backgrounds and visual effects.
- This integrates live transcription with customized video backgrounds for enhanced visual presentation.
- Connect the HDMI output from your computer (running Live Capture) to the closed caption encoder.
- This sends the live transcription and visual elements to the encoder for processing.
- Connect your main video source (camera or pre-recorded content) to the captioning hardware.
- This video feed runs parallel to the Live Capture HDMI input.
- The encoder processes both video feeds and generates a final output: live video with embedded real-time captions.
- The result is a professional, accessible broadcast with synchronized audio, video, and captions ready for distribution.